Saturday, October 8, 2011
T minus 35
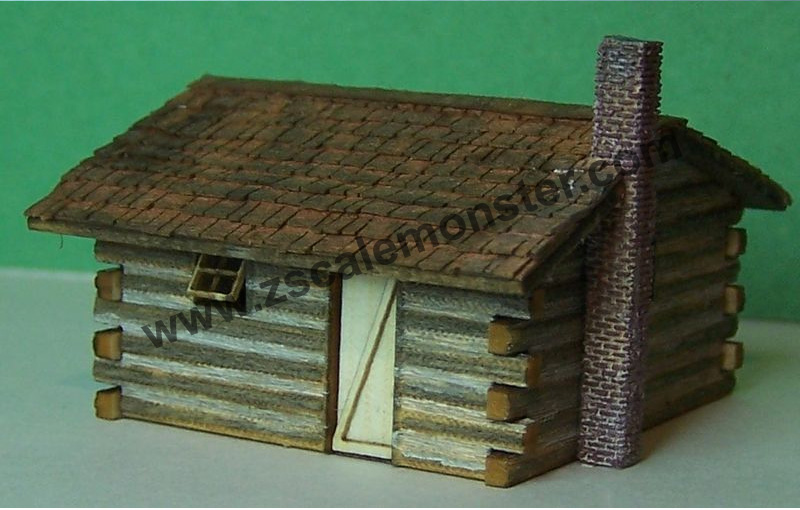
Days to the Granite City Train show that is. I love the show. It' s always a great deal of fun and people really enjoy seeing the small trains I bring along. The Z scale layout already runs very nicely. So all I have to do is build the structures that arrived from Zscalemonster the other day. That is the log cabins and passenger station shelter I referred to in my last post. I'm always amazed when I open the bag of tiny lazer etched pieces of wood and see how they all fit together and these from RSLaser and GCLaser don't disappoint at all. The kits look so simple and the fit of the kits is nigh on perfect. A log cabin campsite served by a small passenger depot will make a nice touch on the model.
Friday, September 30, 2011
Summer is over. Model Railroad fun begins
Yes. The leaves outside are turning orange and red and yellow. The MGB is ready to be packed away and I'm ready to have some fun in the model railway world again. The summer break is most welcome, I can forget about things for a while and come back refreshed. The Saint Cloud, MN Granite City Train show is coming up in November and its pretty traditional that I take my collection of "small" model trains to that show. The T scale is coming out of retirement, I'll take along some of my Nano Model Railroading efforts if I think they are worth it when I get them finished and of course the Z scale layout too. Now, way back earlier in the year, on a high from showing it the last time I said I was going to add some more bits and pieces to the layout. A few structures perhaps. I have not forgotten this. I'm looking out for some nice small structures to add to the layout to add some character. I do like these cabins from RSL Laser. But I'm looking for a nice easy smaller depot kit too. Something like this one. But thats an extensive conversion of an existing kit. I'm looking for a relatively quick straight build I think. Any ideas? Feel free to pass on any thoughts.
Thursday, May 12, 2011
An observation about switching
Speaking as a railfan. I'm lucky.
Lucky that my office overlooks a small rail served industrial park and every afternoon a train of varying lengths pulls into the yard and cars are spotted to the industries hereabouts.
Now, apart from the fact that this could be a highly desirable prototype to model for a future layout. (Let's not go there just yet.) I get a daily opportunity to watch switching operations and see how trains really run at slow speeds.
From my office window they run smoothly. No bumping and banging and bouncing over sagging track. From here, no more than 50 yards away everything looks perfect. I know it isn't of course because I've stood down there and heard the bumping and banging and seen the bouncing.
From here it looks just as smooth as the Z scale GP35 did running on my layout from about a foot away.
Now in HO scale and upwards I know modellers can go to great pains to recreate the bumps and bounces of older track. Whereas it is very clear that in Z scale you don't need to bother even if you plan on viewing your model even from as close as your eyes can stand.
Wednesday, May 11, 2011
Next steps
Where to from here with my Z scale adventures?
I have to admit I was definitely on a bit of a high after the show the layout had run so well. Especially as a "well meaning" N scaler went to great pains to tell me that the Micro Trains GP35 was noted for overheating and could melt the body of the loco. Well matey boy, it didn't. It ran faultlessly for six hours and never felt warm.
The next steps then. Well, I've ordered a couple of kits. A Z track craftsman kit of a centrebeam lumber car. The prototype is a car I see a lot of when I'm out lineside watching trains. They are a pretty distinctive prototype and the kit is not unreasonably priced. When finished, it will add more interest to the freight train as it runs around the layout.
Then for a bit of fun I ordered a pack of these, picnic tables from rslaser.
Fun? Yes. they'll be pretty small. Just how small I don't know. Knowing how small I'll be able to work in Z will help me decide just what I can do. When I get some of these built I'll add a picnic site to the layout for a little visual feature.
What else?
In a few weeks I'm off back up to the Knife River locale again. I'll be running Grandmas Marathon again. The old depot at Knife River still exists to the best of my knowledge so I plan to pay it a visit, photograph it and then construct a model of that and site it on the curve at the front right where there is plenty of space to fit it in.
Another item of rolling stock would be nice. The American Z lines Budd RDC-2 perhaps, to provide a passenger service to the new depot. It's not exactly the same as the RDC-3 that the DMIR used but would be near enough for me I think.
Should be enough to keep me going for a while I think. When I get those projects done I think I'll be well on the way to deciding what I can achieve in Z.
Thursday, May 5, 2011
"One instinctively knows when something is right"
Dredged up from my memory is that tagline from an old TV ad for Croft Original Sherry. It came to mind whist I was watching the train circle around the layout at the Granite City train show on Saturday.
Z scale is right. Well, right for me anyway. Right.
What on earth does that mean?
All proponents of whatever scale they practice claim that their scale is "right" some even go so far as to claim their scale is perfect, citing all kinds of reasons and theories. For them, maybe their chosen scale is right. Some folks won't even consider that other scales have anything going for them.
All I know is I got a definite feeling that Z scale was right. It's not a feeling I've ever had with T scale (I like T scale for the reactions of the viewing public more than what I do with it)
As much as I like HO scale and as productive a modeller I am in the scale, Z feels different. I can't describe it.
In fact there's only one other scale that I've had this "rightness" feeling for and that's Gn15. You can't get more different than Z scale standard gauge than large scale narrow gauge. But both have tapped into certain attitudes to my modelling and my abilities to carry these attitudes out to a standard that I'm happy with. I'm not saying it leads to perfect modelling. Far from it. It's modelling that I'm happy with. I have several layouts in unfinished states because I didn't get that right feeling from the scale. Now with Z I've got it again, which is good, because it means I'll carry on and perhaps build "that layout", the one I've been trying to build all my life.
Saturday, April 30, 2011
Making an exhibition of myself
I am now returned (and recovered) from the Granite City Train show where a great time was had by all. Those of you who follow my other blogs know that I can't speak highly enough of the show. It's always a pleasure to attend and this year was no exception. Ed Olson, the organizer said that this was the most successful show to date and I can believe him. I came away from the show with a very sore throat which means I must have been talking a lot. I did a lot of explaining of the difference between Z and T.
We were sited next to an N scale layout so that made for a very effective demo for the punters of the relationship of the differing sizes of the scales.
After I arrived and set up I made a quick trip over to the Perrys Hobbies stand to see if he had any Z scale for sale he had one piece, a Micro Trains TTX flat car so I bought it and quickly added it to the layout. Luckily for my wallet Perry had left his Z scale cases at the shop.
When the doors opened it was relentless for about 5 of the 6 hours of the show. Talk, talk, talk. It was all a blur at times, especially the first couple of hours. I made my regular appearance on local station W-JON hopefully putting across a positive image of the hobby.
What can I say about the running of the layout.
Perfect. I can't say any better than that.
Here's some film of the layout running.
It ran like this for the whole six hours of the show. I would run the consist one way for an hour and then the other for an hour. It was perfect. I'm really really impressed with the running quality of this set. It certainly spurs me on to do a little more with Z.
I just want to close by once again giving out a big thanks to Ed Olson and the crew for putting the show on. It is always a great time.
Thursday, April 28, 2011
Exhibitable
Here we are, ready to show. It didn't take all that long to get this stage. Five or six days perhaps. There's a few things that I could put right if I had more time but I think (I hope) that people will enjoy taking a look at it.
 Above: An overall view. The overall size is 30" x 20". There's lots of different types of trees some Woodland scenics trees, Woodland Scenics fine leaf foliage and home made pine trees.
 Above: A close up of the bridge. Overall I'm really really pleased with the bridge. I'm still not totally comfortable with the self adhesive qualities of the stone material but the effect of it is well and truly worth it.
 Above: The "accidental" rock face. It's just a rough cut expanded polystyrene painted with Woodland scenics Earth ground colour. It looks really quite convincing.
 Above: Another view of the bridge. Alas, you can see a section of handrail dropped off whilst I was handling the layout for the photos.
So far constructing the layout has been a very rewarding project. I think I have a "feel" for working in Z scale now. I have to say I like it so far. I'm curious to take my adventures further.
Wednesday, April 27, 2011
Trains run!
Exciting day day today. Not only did I watch Ishant Sharma take 5 for 12 for Deccan Chargers against Kochi Tuskers in the IPL but I had trains running on the Knife River model. To prove it here's some film.
The layout is coming together nicely.
Meanwhile it snows outside..
Tuesday, April 26, 2011
Bridge comes together (layout progress 5)
Today was a grey, wet, horrible day. Hardly worth having the day off work to be honest. Then again if the weather had been nice I probably would have been out in the MGB now that it is out of winter storage. So the weather forced me on to getting the bridge closer to completion. Here's a few photos via the iPhone and Photoshop express...


 ...I reckon it looks the part.
Monday, April 25, 2011
the grass is greener... (Layout progess 4)
This week I booked the time off work to prepare both layouts for the Granite City Train show. With Gonou already working I can devote the time to completing the Knife River Bridge display.
A bit of ground cover first. Nothing too detailed yet. Some earth coloured Woodland scenics ground cover followed by a coating of a mixture of different greens. Kind of like an impressionist painting. All fixed in place with Woodland Scenics scenic cement.

So, onto that strange pastelly, fawny, browny streak in the middle where the Knife River should be. Hereabouts the Knife River is actually very shallow and beautifully crystal clear with lots of stones on the bed. So a deep blue is out of the question. My thought is to create a sort of impressionist painting (there's that phrase again) of the river bed. Then paint some gloss medium over that and then scatter some Woodland Scenics (there's that name again) Talus of varing sizes into that. Hopefully that should re-create the effect I'm after.
Saturday, April 23, 2011
Yes it is that easy!
A couple of posts ago I said that I was going to have to slice up a couple of sections of MicroTrains track to fit on the layout. I was going to use these instructions on the James River website. It seemed easy enough and I can report that it is.
1. Cut out the middle section so that the roadbed forms the length of track you'll need.
2. Nip off the fixing pins.
3. Slide the 2 sections of roadbed together and glue them.
4. Fit the track and rail joiners.
Bingo! Shortened track!
No point in posting pictures because the finished sections of track look just as they do on David's website.
Thursday, April 21, 2011
The snow has gone (layout progress 3)
The "Minnesota winter" stage of layout building never lasts very long. Significantly shorter than an actual winter. A coating of my favourite Woodland Scenics Earth colour soon kills the white and starts to make the ground look like ground.


Wednesday, April 20, 2011
Layout progress (2)
This one of those "I love it when a plan comes together" sort of posts. Things are definitely beginning to look up. Things are progressing well. The polystyrene landscape formers have been hacked into some sort of shape and are being covered with lightweight spackle. The scene really does start to resemble a Minnesota winter scene!

 Here's the bridge talking shape. The abutments are clad in the Chooch flexible stone sheet and the handrails are fitted.
 Here's a closer look at one of the abutments. This Chooch sheet is a super material, quite possibly the most convincing stone material you can buy "off the shelf". Superb relief and texture. It's easy to work with, though being flexible you have to be careful cutting it as you can stretch and bend the material as you cut it. I'm in two minds about the self adhesive quality though. Like I said in a previous post it's "tacky" rather than "sticky". The recommended substrates are Masonite, Pink foam and thick card. I used a thick card on these abutments and the material still slides around on that and isn't fixed in place as such. The instructions say you can also apply adhesive to the backing paper if you have problems. But that really obviates the need for the self adhesive backing, doesn't it?
 This is the only downside to the material though. I really do like it. They need a little colouring to look more like the native North shore stone and to also hide the cut edges but the instructions cover that too.
All in all a worthwhile product.
Sunday, April 17, 2011
Layout progress (1)
After Fridays "blocking out" it didn't take long for some tangible progress to appear. I started to slice away at the white foam with my new hot wire cutter and the landscape began to appear. The picture below shows the "typical Minnesota winter" stage of layout building; i.e. everything is white. You can see how I have quite literally been hacking away with a knife and hot wire cutter to give the ground some shape. The roughness is of no consequence as the next stage will be to cover it in lightweight spackle once I have added a little extra to the river bank, finished the bridge abutments and bedded them in.
 What you will also notice is that there is a big old gap between the end of the bridge and the beginning of the curve. Sixty-seven millimeters of gap to be exact. The shortest length of MicroTrains roadbed track is 110mm (what kind of knuckle-head thinks that 110mm is a good shortest length of track). So I need to shorten a couple of sections of track by 43mm to fit them in. Not a difficult task as there is a step-by-step guide here on David K. Smith's James River Branch website. I knew I'd seen this in my previous trawlings through the site and it only took a few minutes to find it again. The process looks pretty easy to do. I've got a pack of 12 straights so I should be able to get two short sections out of those.
 Finally a view of what the layout is about. The train running over the bridge. In this specially posed shot you'll see a new item of rolling stock. A weathered Railbox from MicroTrains.
 I like Railboxes as readers of my other blogs will know. This one is a gem and looks like a pretty good representation to me. Perhaps I'll write more on it another day. But right now dinner is almost ready, so I'll bid you all adieu, 'til next time.
Saturday, April 16, 2011
Shopping (a bit of a soapbox)
Just got back from a day trip to St. Cloud, MN this morning the Minnesota MG group had an open house for the members being as I own a 76 MGB I went along to introduce myself. I showed them pictures of my baby. Which they were all very nice and complimentary about and I lusted after some of the other attendees cars especially one members 1961 MGA. But my total adoration was reserved for a wonderful E-Type Jag in the workshop. But I digress...
After that I went over to Bakers Hobby Supply in Waite Park. A true local Hobby shop. Carrying something for many types of craft and hobby with a growing model railway section so I picked up some trees and fine leaf foliage for the layout. I can't say enough about supporting your local hobby shop. Yes the internet offers you great deals and cheap prices but sometimes it's just better and more fun to go to your LHS and talk and buy. Talking to the owner today he expressed an interest in me displaying Gonou, my T scale layout in his shop. I would certainly be interested in taking him up on that offer. If that could get more people interested in the hobby then great. People today need creative hobbies instead of playing with their X-station-Playbox360's to my mind.
Next trip was to Michaels, the craft superstore. I needed a new hot wire foam cutter the one I bought from them 12 years ago died a death recently and I needed a new one to shape the foam on the layout for the ground.
Twelve years ago I paid $1.99 for a cutter in a closing down sale. It was no more than a cardboard tube to hold the batteries with a cutting frame attached. This one cost me a whopping $9.99! But at least it has a plastic tube to hold the batteries and a proper on-off switch. Better than paying $40-50 for the woodland scenics mains powered one.
There were are lots of stuff bought and lots to do. I still have to catch up on todays Indian Premier League Twenty20 cricket yet too...
Thursday, April 14, 2011
Visualising the layout
Here you are then, after the bad news of the flexible stone material. Some good news.
A first look at the blocking in for the layout.
 Just an oval of track with a bridge going over a river scene. There will be lots of trees around to cover the exits to the rear and a nice sweeping sky backdrop hiding the back of the loop.
Should do the job quite admirably I think.
I'd better get a move on its only 2 weeks to the Granite City Train show.
One step forward...
... two steps back.
Well probably no more than one step back, perhaps just a trip and stumble but I digress.
The other day the Chooch flexible stone arrived. Just one look at it and I was really impressed. I was fired up and wanted to get it on the bridge abutments there and then.
But as things progressed with the material I began to realise that perhaps things wouldn't be all that perfect.
The finish on the material is excellent, there is no doubt about that. But the flexibility and the adhesive on the material bothered me, and as I began to cut and stick it to the styrene my worries grew. The material is flexible yes. But It didn't want to go around all the right angled corners and steps on my abutments. Then there was the adhesive. Sticky, no doubt. Tacky might be a better word. It didn't want to hold the material in place. It slid about a lot and sure enough when I went back to the abutment I'd covered the next day. This was the sight that greeted me
 Not good.
Perhaps If I'd put a coat od primer paint on the styrene...
Not to worry. I'm currently building new abutments out of card. The material seems to stick better to that.
Those are currently setting at the moment I'll probably get to cover them this weekend.
Thursday, April 7, 2011
At last!
Pictures!
My temperamental modem has started working again (perhaps because it knows that at the earliest opportunity we will be changing internet provider) So here's some pictures of the progress so far.
 Above: This is an overall view of the bridge sans central support pillar
 Above: The styrene shells of the abutments this will be clad in some embossed stone material of some sort.
 Above: The deck of the bridge. The inset between the rails is some 4mm "U" channel
 Above: A test fitting showing a section of the Plastruct handrail HRS-2 in place
Tuesday, April 5, 2011
Carrying on
I might not be able to upload pictures but I can at least report on the progress on the model.
So far so good. I think it's heading in the right direction.
The girders are in the right place underneath the bridge deck which is also in place.
I've built the shells of the abutments and the centre pier as well thtose these might be subject to change when I get the sheets of stone material they will be clad in. I've ordered a pack of N scale Plastruct dressed stone embossed sheet and a sheet of a material that really intrigues me. It's from Chooch enterprises. It's a flexible stone sheet. I hope that I'll be able to cut it to size and shape to fit it on the pier and abutment shells. I think I'll be making new abutments probably because of how thick the material looks, we'll see. I've also ordered 4 packs of the HRS-2 Plastruct handrails. Cut down a bit they should also do the job.
All the materials are in the mail and should be here shortly, meanwhile I sit and twiddle my thumbs...
Friday, April 1, 2011
Quick Question
Anyone know where I can get some Z scale handrails suitable for this bridge?
I thought I had something suitable from plastruct in my spares box, but I was wrong.
I suppose I could piece something together out of evergreen strip but an easier option would be nicer...
I thought I had something suitable from plastruct in my spares box, but I was wrong.
I suppose I could piece something together out of evergreen strip but an easier option would be nicer...
Technical issues
Not with the bridge building project. Oh no that's proceeding very nicely thank you. My technical issues concern the modern technology of the internet. For some reason my home Internet connection has been rather spotty and I can't spare the time off work to wait around for AN ENTIRE DAY waiting for the repair man so all I have to blog with is my iPhone. So if you are after a photo filled report - Sorry hope to get to a wi-fi connection with my lap top soon. Blogging on an iPhone is no fun..,
Tuesday, March 29, 2011
The Bridge
The bridge, as it turns out is the most important part of the layout both as a scenic feature and the construction. I can't really begin the construction of the layout until I've made the bridge. I don't know how high above the water level the rail level will be until I've made the bridge. So I can't work on the ground contours. All construction hinges around the bridge. So I'd better get building. Tonight I took a look at it to try and work out how it will go together to suit my purpose.
 Above: This is the bridge as it comes, a very nice simple kit. The sides fit on the side of the roadbed track thanks to some sturdy locating pins.
 Above: This is how I want the bridge to look with the girders underneath. A slight issue is that the girders are not flat topped or bottomed. You can see in this picture that they are stepped slightly. But I can hide the uppermost surface when I fix the girders underneath the roadbed track and assume that the lower surface won't be as noticeable when it is assembled.
 Add a new deck and railings out of styrene and "Bob's your Uncle!" A bridge.
First Run
OK. So I couldn't resist it. I had the set out of the box testing it out to make sure it worked and well, my iPhone was to hand so I shot a little bit of film of it. Just a little mind you just to make sure I could add video to this blog without too much head scratching. So enjoy a train running around in circles for a minute or two. Like I say It's quite cathartic.
If you'll excuse me. I'll go and start on the girder bridge for the layout.
Friday, March 25, 2011
It's here
When I arrived home from work yesterday there was this big brown box on the doorstep.
 Look what was in there!
 Alas I was too busy with other things last night to run it. But I did take a good look. Here's what the set looks like without the lid on. I have to say that this is a well presented box of trains. Simply and cleanly laid out, the individual rolling stock items are in plastic cases like retail models. (In fact the retail model prices are on the back of the cases.) So the items do come well protected.
 Here is the loco, and to totally surprise you I'll say this. It's so BIG! With my current T scale mindset these trains are huge. They are twice the size of T. Of course if you have a HO or O scale mindset these trains are tiny. Just shows how your point of view can be influenced.
 I so want to get this train running. Perhaps tonight.
Thanks to Zscale monster for a speedy delivery.
Sunday, March 20, 2011
Happy Birthday honey! Here's a field trip for you
'Tis my Birthday today, (you don't need to know how old) and to celebrate my wife took me away to Duluth/Superior for the weekend.
Saturday was a truly wonderful day weather-wise and after a visit to the scenic Gooseberry falls we stopped at the Knife River Bridge so I could take some photographs for the project.
 Above: This shows the decking arrangement quite clearly.
 Above: The Centre Pier. A nice big piece of driftwood there.
 Above: The Northern Abutment, flippin' dead bush manages to catch the point of focus rather than the bridge abutment. Not to worry though...
 Above: The Southern Abutment it seems essentially identical to the Northern one (and why wouldn't it be?)
 Above: Overall view of the bridge. Even in the Winter this is a beautiful scene.
OK. So those pictures should be enough to see me thought the job. Being the winter I could not get the other side of the bridge for reference shots. The campground was closed. But I have found shots of the lakeward side of the bridge online.
I still think that the Micro Trains bridge might be a good starting point for the project as I could cover the bridge ties (sleepers) with .010 styrene or similar, add some check rails and other bits and I'd be sorted for a starter project. We're not going for scale accuracy here, just something that feels like the scene.
Thursday, March 17, 2011
What to do?
It's a good job I didn't promise not to post every day on this blog otherwise I'd be in a mess very quickly...
So, what to do with my Z gauge set when it arrives? I like to plan ahead. That way I'm not "Umming and Ahing", wasting valuable modelling time later on when the stuff actually gets here.
The first plan for this Z scale stuff is to accompany the T scale layout to shows so that the naysayers can compare the two scales and see the difference. I'd really like to have some kind of scenic development on the baseboard in time for the Granite City Train show at the end of April. Not long, But heck, I can build a layout in 5 days! So that shouldn't be too much of a problem. Just keep it simple.
But what?
How about this scene?
The Knife River bridge on the North Shore of Lake Superior.
It's certainly simple enough, a single line on a bridge over a river that appears and disappears behind trees immediately before and after traversing said bridge. Flipping perfect if you ask me.
It is a location I am very familiar with I have plenty of pictures of it myself.
It should be quite an attainable goal for a starter layout don't you think?
Wednesday, March 16, 2011
Its early days
Oh how I love them!
You know, the early days in a modelling project when you're fired up with enthusiasm and can't wait to get on with it.
I know you know, we all get it. Wether it's blogging everyday (though I will try not to...) or spending inordinately long periods of time actually working on the layout/building/item of stock. When I start on a project hours can literally fly by I'm so fired up and into a project. Or whatever, you know you do it.
With my Z scale knowledge still being somewhat limited I've been doing a lot of web surfing checking out websites for layouts, products etc; with the intention of posting them in a little bar on the side over there to the right.
But no. You are spared the agony of having to potentially see a section entitled "LinkZ"*
Because there is only one link you need if you model in Z. This one. American Z Scale. Therein you will find links to just about every manufacturer, dealer and Z scale modeller of worth.
I am still ploughing through it. I never realised there were so many people out there producing items of all sorts, structures, locomotive kits, rolling stock for Z.
Then there are the layouts. I was quite impressed here. Yes, there are people producing the novelty "layouts-in-a-suitcase" to showcase the space saving qualities of Z. But at the other extreme there are also people producing models of the California coast or Arizona desert where really long trains can stretch their legs and look like long trains should. Super.
A great idea to pull all these links together in one place. It makes everything so much easier. Now if you'll excuse me, I'm off back there right now.
*No, I wouldn't have really done that. I have to much respect for you, my readers to do something that twee and naff...
Monday, March 14, 2011
Gone and done it now...
Travel with me if you will in my Tardis "borrowed" from reknowned time traveller "The Doctor" from the classic British TV series "Doctor Who".
We arrive outside a small curio store on Steep Hill in Lincoln, England in 1981.
A group of Art college students walk past and one spies a tiny Z scale train set in the window.
"Would you look at that!" He says in a rather loud voice.
The store owner responding to the shout sets the tiny train set of an 0-6-0 tank loco and three freight wagons running. The student was fascinated...
You guessed it that Art Student was me. I can't remember accurately if it was just a few hours or days later that I was in the store and handing over some of my hard fought for student grant for this Z scale starter set.
At that time Z scale was the smallest commercial model railway in the world. Since recently passed by T scale which I also enjoy modelling in.
I did manage to buy a few other items of Z scale and even put together a small exhibtion layout on a small board which I showed in Lincoln a couple of years later just before I left the college.
Z was very expensive to me back then so I never had much equipment. One diesel, one steam loco a couple of coaches and the wagons. But it was fun stuff to have and I enjoyed watching the tiny trains navigate the small oval. Much in the same way as I enjoy watching my T scale do the same.
Alas when I emigrated to the USA I left the set behind (along with many other things I regretted leaving) I thought I'd left Z behind. Until however I started modelling in T. I started to remember the fun I had in Z. Especially when I was struggling with some scratch building in the scale. Even more so when people would come up to my T scale layout and say.
"This is Z gauge."
Some would be quite incredulous when I told them otherwise. Some refusing to believe me. So I thought to myself perhaps it might be a bit of fun to have a Z scale layout alongside the T.
Just to shut those naysayers up.
I started to dig and I followed this blog intently. I've read every post time and time again, wrestling with making a foray into Z.
So with getting a rather nicely sized bonus from work just in time for my birthday. I took the plunge and ordered a SOO line starter set from Z scale monster. They seem to be regarded very favourably in the Z scale world. So the set and power pack is on the way.
I wonder where this will all lead?
Subscribe to:
Posts (Atom)